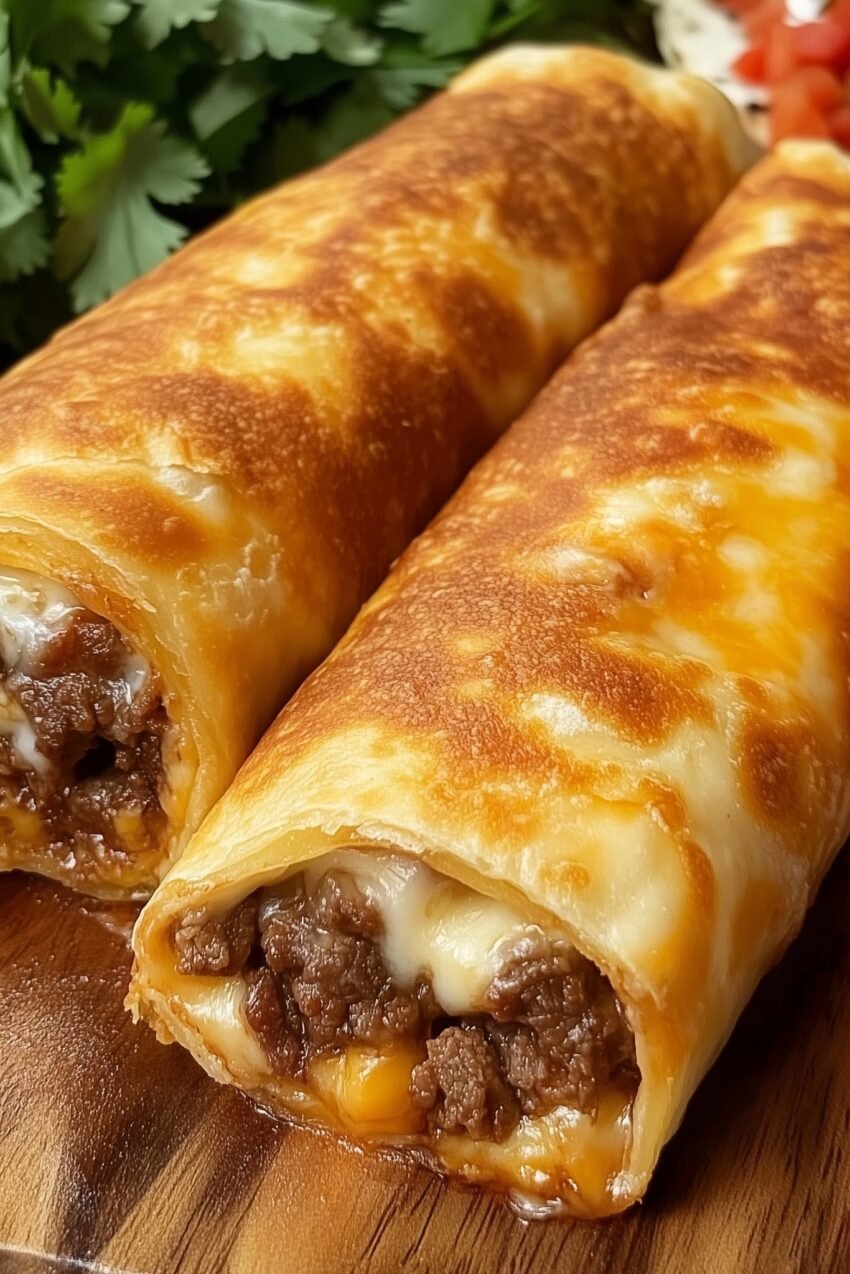
Oh yes—Crispy Beef & Cheese Chimichangas are golden, crunchy, and loaded with melty cheese and savory beef. 🌯🧀 Perfect for a weekend treat or a fiesta-style meal! Here’s a tried-and-true recipe:
Crispy Beef & Cheese Chimichangas
Ingredients (4 servings / 4 chimichangas)
Filling
-
1 lb (450 g) ground beef
-
1 small onion, finely chopped
-
2 cloves garlic, minced
-
1 tsp ground cumin
-
1 tsp chili powder
-
Salt & pepper, to taste
-
1/2 cup salsa or tomato sauce
-
1 cup shredded cheddar or Mexican blend cheese
-
Optional: 1/2 cup black beans or corn
For Assembly
-
4–6 large flour tortillas (burrito size)
-
1–2 tbsp oil for frying (or cooking spray if baking)
Toppings (Optional)
-
Sour cream
-
Guacamole
-
Salsa
-
Shredded lettuce
-
Diced tomatoes
Instructions
1️⃣ Prepare the Filling
-
In a skillet over medium heat, sauté onion and garlic until soft.
-
Add ground beef, breaking it up with a spoon. Cook until browned.
-
Stir in cumin, chili powder, salt, and pepper.
-
Add salsa (and beans/corn if using) and simmer 5 minutes. Remove from heat.
-
Stir in shredded cheese until melty.
2️⃣ Assemble the Chimichangas
-
Place a tortilla flat. Spoon 1/4 of the beef and cheese mixture in the center.
-
Fold sides over the filling, then roll tightly from bottom to top. Secure with toothpicks if needed.
3️⃣ Cook (Two Options)
Frying (Traditional Crispy)
-
Heat 1–2 tbsp oil in a skillet over medium heat.
-
Fry chimichangas seam side down first, turning carefully until golden brown on all sides (3–4 min per side).
-
Drain on paper towels.
Baking (Healthier Option)
-
Preheat oven to 400°F (200°C).
-
Place chimichangas seam side down on a parchment-lined baking sheet.
-
Brush lightly with oil or spray.
-
Bake 15–20 minutes until golden, flipping halfway.
4️⃣ Serve
-
Remove toothpicks.
-
Top with sour cream, guacamole, salsa, or fresh veggies.
Tips
-
Cheese choice: A mix of cheddar + Monterey Jack or a Mexican blend gives best meltiness.
-
Tortilla flexibility: Large, pliable tortillas roll better without tearing.
-
Advance prep: Fillings can be made a day ahead; assemble and cook when ready.
-
Extra crunch: Frying gives the iconic crispy shell, but baking is easier and lighter.
If you want, I can also give a quick 20-minute skillet version that doesn’t require frying and is just as cheesy and delicious.